Replacing Conveyor Bearings
How to replace bearings in the PhyzBatch-9000 conveyor.
The bearings in the PhyzBatch are what allow the shafts to spin easily and relatively quietly. While they do have a high mean time before failure, bearings can wear, seize or break over time. This can manifest as clicking or grinding noises, or Conveyor RPM errors while sorting.
A bearing:

Where the bearings are located:


Find the Broken Bearing
- Remove the conveyor cover by taking out the thumbscrew and pulling the cover away from the scanner.

- To run the conveyor, select "Limit Search by Set" in the Sort menu and select "2016 Heroes of the Realm". This will run the conveyor continuously until stopped by selecting "Clear Machine" from the maintenance menu.
Conveyor RPM stops are disabled in this mode. If you get anything caught in the conveyors or gears, it will continue to run until Clear Machine is triggered, the main switch is toggled off, or the motor burns out. Caution is advised!
By Sound
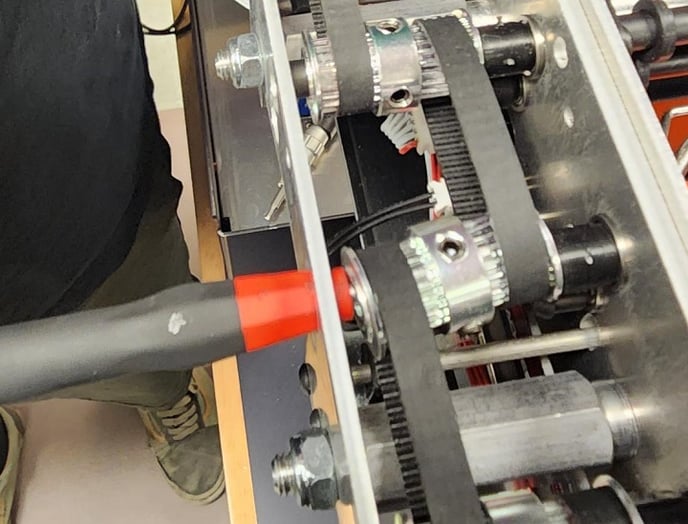
- A broken or seizing bearing should produce a distinct grinding or otherwise unusual sound. Listening to the location of the sound can provide a good idea of which bearing is causing the problem.
Our assemblers recommend using a stethoscope to pinpoint the sound. Since that's not part of the standard kit included with a game store, a rolled-up magazine or cardboard tube can substitute.
Sound can propagate along the shafts, so the sound will likely only tell you which group of bearings may contain the broken one.
By Sight
Broken bearings will often have one or more small cracks on the inner or outer ring. Although it is recommended to start with an auditory search, once the area has been narrowed down you can find the specific broken bearing visually.
Mechanical Search
- Make sure the conveyor is not running
- Do not fully remove the screw from the pulley, they're small and easy to lose!
- Loosen the 2 screws (either 1.5 or 2mm Allen key) on a conveyor pulley so that the shaft can spin freely.

- Loosen the 2 screws (either 1.5 or 2mm Allen key) on a conveyor pulley so that the shaft can spin freely.
- Run the conveyor again or turn it by hand to see if the sound goes away. You may need to hold the loosened shaft so it doesn't spin. If the sound remains constant, try a different pulley. Once the sound stops, tighten the unaffected pulleys back up.
Replace the Broken Bearing
Once you've found the offending bearing, complete the following steps to replace it. The conveyor should not be running during this procedure.
Top Shaft
- Loosen the 2 screws (either 1.5 or 2mm Allen key) on a conveyor pulley so that the shaft can spin freely.
- Do not fully remove the screw from the pulley, they're small and easy to lose!

Place your 5mm Allen key or a screwdriver against the pulley end of the shaft. The screwdriver or key can go into the pulley, shaft spacer, and mounting hole to hold the pulley and its belts level. This makes reinstallation later much easier.

- Pull the shaft out from the gear end, and make sure not to lose the rubber O-rings.

- The bearing should fall out or be easily removable once the shaft is no longer inserted. It can be pressed out with a screwdriver or Allen key if not.
- Install the new bearing by pressing it into the hole, from the same side as the others
- Reinsert the shaft, making sure to add the rubber O-rings back on.
- Once the shaft has been reinserted into the spacer and pulley, line up the gears, then hold the gear and pulley with one hand while tightening the screws to make sure everything stays lined up

- Line up the rubber O-rings with the rest of the conveyor

- Try running a "Clear Machine" function from the Maintenance Menu to briefly test the conveyor.
Bottom Shaft
Replacing a lower bearing is much more involved than the top. If you'd prefer that your conveyor be swapped instead, please contact Support.
- Disconnect each solenoid from the control board. Make sure to remove it by the plug, and not the wires to avoid pulling the wires out.

- Remove the following screws and nuts, then take the side cover off of the conveyor. Pull it straight back, because the solenoid mounts will still be inserted into the flapper arms.

- Remove the shaft cap (may need to remove the pulley above, if so see Top Shaft)
- If you have a replacement: the cap can be pulled off with pliers or broken
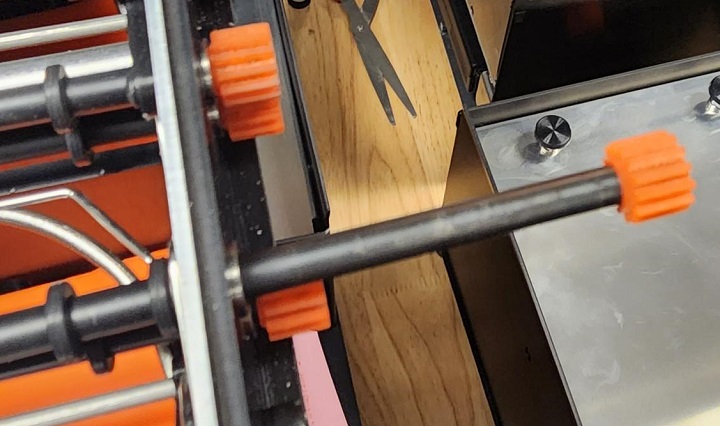
- If you do not have a replacement: work a tool (wire cutters shown here) under the edge of the cap and work it off

Shaft cap:

- Pull the shaft out from the gear end, and make sure not to lose the rubber O-rings (this is the top shaft, but the method is the same)

- The bearing should fall out or be easily removable once the shaft is no longer inserted. It can be pressed out with a screwdriver or Allen key if not.
- Install the new bearing by pressing it into the hole, from the same side as the others
- Reinsert the shaft, making sure to add the O-rings back on.
- Line up the gears, then press a shaft cap back onto the other end of the shaft
Installing the shaft cap takes a considerable amount of force. It may be easier to remove the gear (in a similar manner to the cap), remove the shaft entirely, and then beat the shaft into the cap with a mallet. Once done, reinstall the shaft from the pulley side and fit the gear back on the other end.
- Reinstall the cover plate. Make sure the solenoid mounts (black plastic square with a hole in it, if present) line up with the flapper arms. The nuts should be firm, but only enough that they're holding the plate on.
- Plug the solenoids back in
- Line up the rubber O-rings with the rest of the conveyor

- Try running a "Clear Machine" function from the Maintenance Menu to briefly test the conveyor.