Like all physical products, the PhyzBatch-9000 needs regular maintenance to run at its best. How often it needs cleaning varies greatly depending on your environment. The frequency of cleaning depends heavily on the condition of your cards, the environment, and how many cards you sort.
It is recommended that, once per day, assuming regular use, the following be performed:
- Clean the Feed Wheels (may need cleaning more often)
- Clean the Scanner Bay
- Check that the Conveyor Rollers are aligned
Additional things that do not require cleaning daily:
- Clean the Foam Rollers
- Clean the Grabber Rollers
- Clean the Feed Fixer Foot
- Remove and Clean the Landing Pad
Feed Wheels
Feed wheels require the most frequent cleaning of all components as they are the first point of contact with cards.
- Select "Clean Feed Wheels" from the Maintenance drop-down.

- Take the provided sponge, dampen it with water, and hold it to the wheels.

Alternatively, use a microfiber cloth and isopropyl alcohol.
Black marks from the rubber, even on a new machine, are normal. This is the carbon from the vulcanization process with the rubber and will not harm the wheels or cards.
- Turn off "Clean Feed Wheels" when done cleaning.
Scanner Bay
The scanner bay should require less maintenance than the feed wheels. The exception to this is if debris is introduced from a card (dust, food, or other sticky substances, etc.).
If you have the following door on the side of the machine, you may skip the following steps. Simply turn the catch to release the side door.
 If you do not have the catch, you can open the side with the following steps:
- Remove the thumbscrew at the rear of the cover, on the underside.

- Pull back the conveyor cover from the scanner; it does not need to be fully removed.
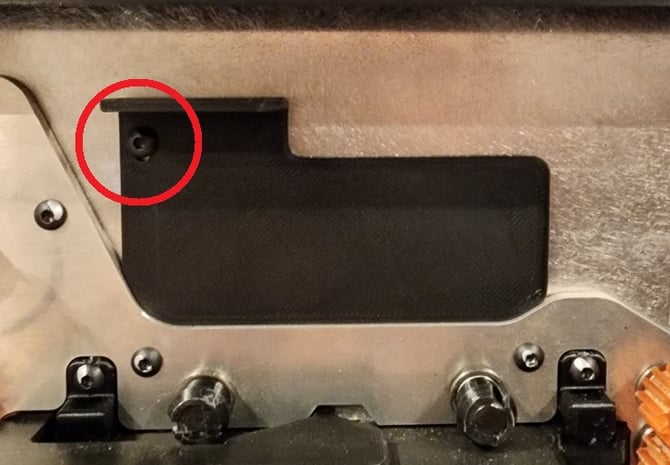
- Unscrew the single screw (2mm Allen key) next to the scanner bay door and open the door
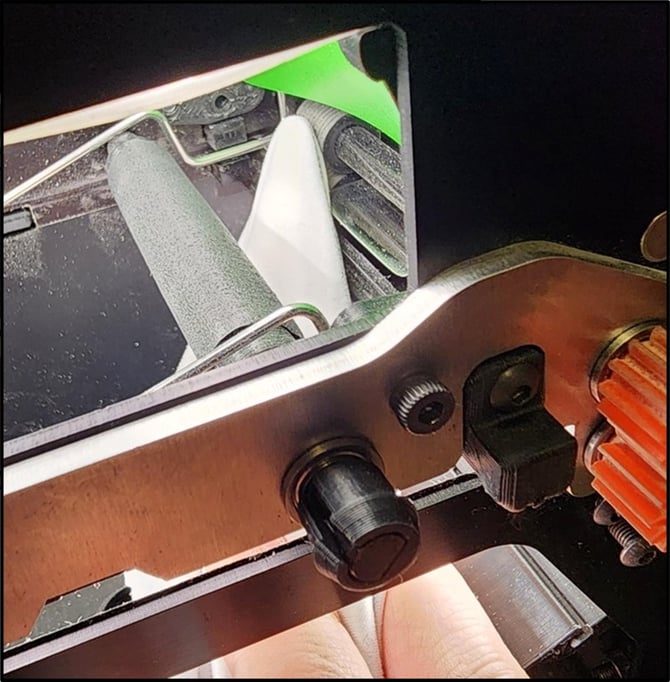
- There are two types of side windows. If your window is similar to the one shown below, loosen the screw (2mm Allen key) holding the black plastic cover (do not fully remove it) and rotate the black cover up and out of the way. Tighten the screw again to hold the window open if needed. You can now see into the scanner bay. Next steps.
- The second type can be removed completely. Turn the dial to the unlock position, then pull the cover off.

- With the window cover out of the way, in the maintenance menu, select Turn Light On to more easily see the inside of the scanner.

- Blow out the interior of the bay with air, either canned or from a compressor.
Blowing out the interior with air is usually enough. If scratching is occurring, continue to the following steps to remove more stubborn debris. Each of these steps is self-contained, but it is recommended to remove the glass and its supporting cover to more easily access the gate and foam rollers.
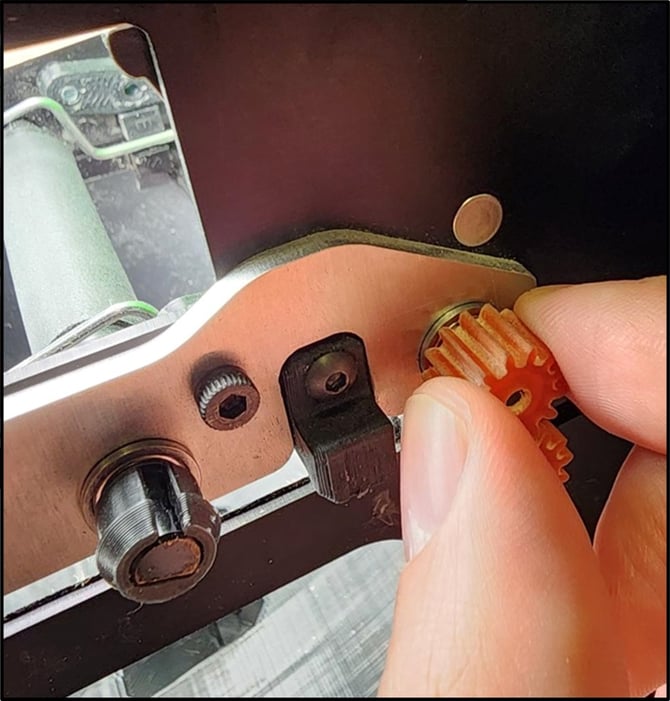
- Before closing up the scanner, check that the exit rollers are properly lined up. These are the rollers attached to the second set of orange gears on the scanner. If they are misaligned, cards can exit the scanner too slowly, leading to cards reaching bins after their flapper has already closed. See below for details.
Glass Plate
The glass can have two adverse effects if it gets dirty. Dust and grime can degrade the image taken by the camera, leading to reduced identification rates, or the process may take longer (tenths of a second, but it adds up). Secondly, it may lead to cards getting stuck on the glass and not feeding through properly. This can lead to the Entry or Exit sensor errors.
- With the scanner bay open, remove the bottom screw (2mm Allen key), loosen the top two screws, and loosen the bottom two thumbscrews holding the metal plate supporting the glass tray.
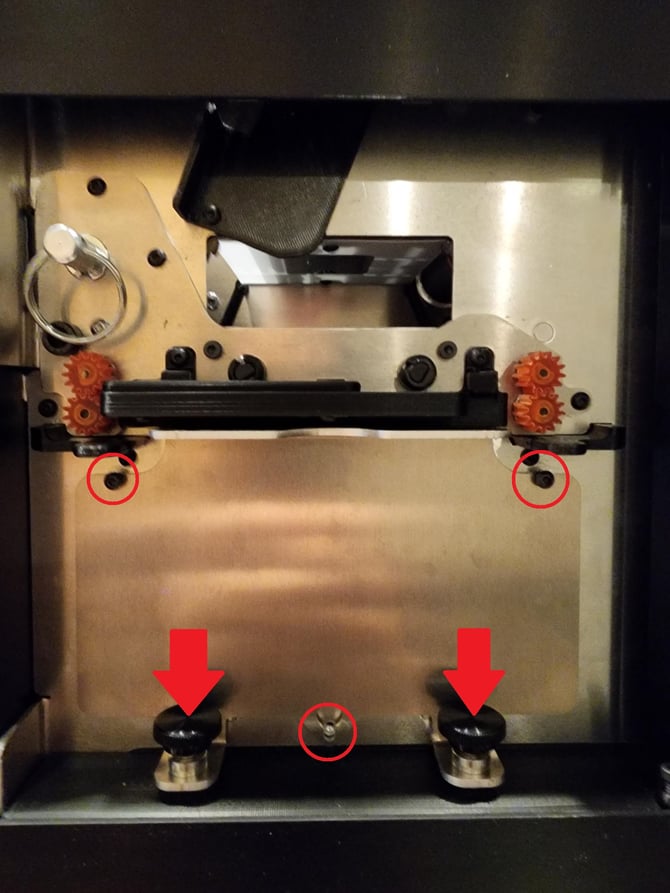
- Pull the glass tray out

The glass is held to the tray by a tab on the front edge, which may become loose during removal. Make sure not to drop the glass!
With the glass tray removed, this is a good time to clean the foam rollers and grabber rollers if you intend to do so.
- The glass can be cleaned with air, or a microfiber cloth with isopropyl alcohol (like cleaning glasses). While it is the same sturdy glass used on cell phone screens, it can snap under too much torsion, so some caution should be taken.
- This is also a good time to remove and blow out the dust trays

- If you need to remove the glass from the tray, move the tab on the bottom to the left. Note that there are small glass knubs that fit into the holder, and these must be properly lined up.

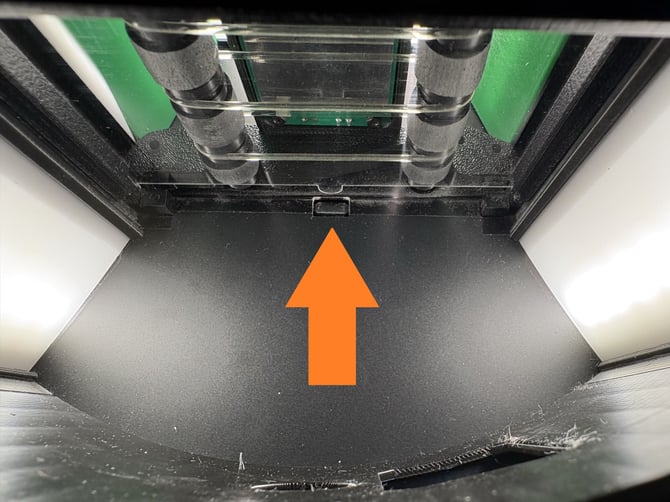
- For reinstallation, insert the glass tray back into the slot. Make sure the glass is under the edges of the front plate, observable through the main scanner bay window as shown below.

- If the Foil Detection Module is installed (the smiling face you see through the scanner bay window), you'll be unable to see the tab in the centre of the glass through said window. Instead, look upwards from underneath the glass through the camera window before reinstalling the metal plate.
- Reinstall the metal plate under the glass tray. The thumbscrews adjust the height of the plate. The plate should be pressed upwards to the glass tray to hold it in place while tightening the thumbscrews.
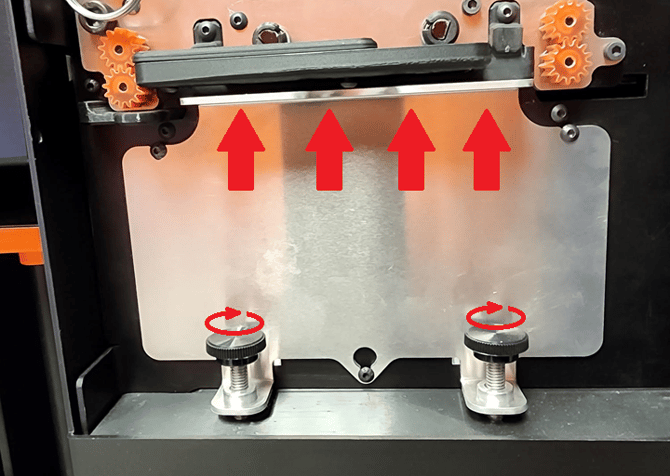
- Make sure there is no light bleeding around the edges of the black plastic glass tray. If there isn't, it's properly installed.
Foam Rollers
With the scanner bay open, wipe the rollers down with a cloth and small amounts of water or isopropyl alcohol (easiest with the glass tray and supporting plate removed to get at the underside). They should not need frequent cleaning unless they're extremely dusty.
If cards aren't moving smoothly through the foam rollers, cleaning them (and breaking up a smoothed layer of dust, if one has formed) can be a solution.
Once the foam rollers are clean, reinstall the glass.
Being foam, they can absorb any cleaning liquid used. We don't want soggy cards (plus they can pick up dust more easily when wet), so use small amounts of liquid (or none) and/or air to dry them more quickly.
Grabber Rollers
The grabber rollers are the rubber wheels immediately inside the scanner. These rollers grab cards pushed into the machine by the feed wheels and pass them on to the foam rollers. They are the primary drive source for the card feeding system. They should not need frequent cleaning, as they function based on pressure, not grip; most feed issues are likely the foot height instead of the rollers.
 With the glass plate removed, add some isopropyl alcohol to a cloth and wrap it around a screwdriver (flat head is best). Then, using the cloth and screwdriver, wipe down the grabber rollers through the side of the machine. You can turn the rollers manually by turning the gears on the right side.
You may run the machine on an empty hopper to turn the wheels and clean quickly; however, it is very important that the cloth (or worse, you) not be sucked into the wheels. Caution is advised!
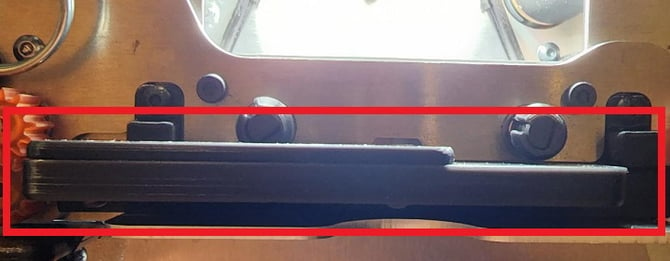
Note that the rollers should all be grouped together as shown above, with both the top and bottom rollers lined up. If the rollers have moved, they should be pushed back into position.
Once the wheels are clean, reinstall the glass plate as shown above.
Conveyor
The conveyor should require very little maintenance. Any dust or debris present should end up in the scanner or remain on the cards. The rubber rollers on the conveyor can accumulate dust over very long periods of time and can be wiped off with a microfiber cloth and isopropyl alcohol.
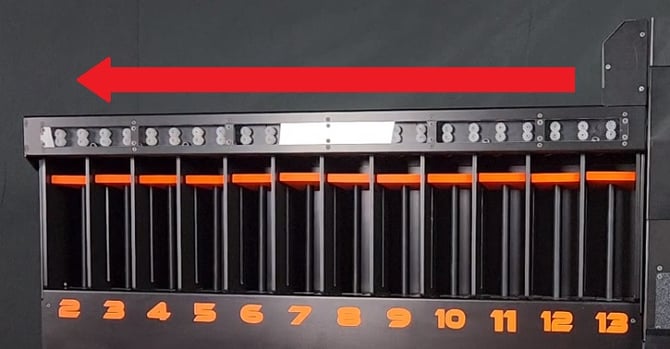
If you're having problems with cards being identified correctly, but going to the wrong bins (the physical count will be off from what the software says), check that the rollers are all lined up as shown below, and reference this guide for potential flapper/solenoid issues.
- The rubber O-rings on each roller should be lined up with each other. Push the rubber rings back into position if needed, making sure that the flappers do not hit them when they open.
Newer revisions of the conveyor have slotted shafts, which indicate where the rollers go, and should help prevent them from moving.
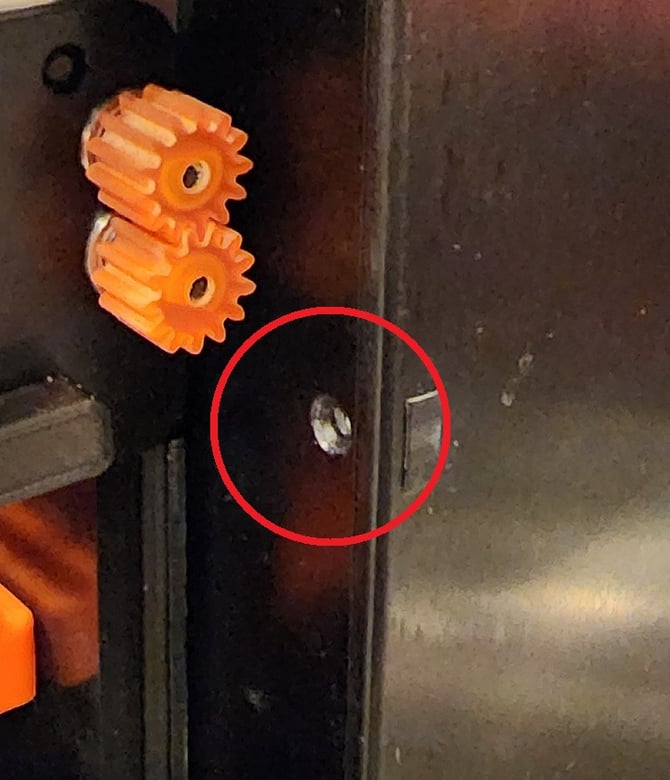
- There is one additional set of rollers inside the scanner that need to be lined up in the same configuration as the conveyor. They can be found where the second set of orange gears is located. To access them more easily, remove the glass, and if necessary, the lower camera shroud (curved piece of black plastic; it slides out).

If the exit rollers are not properly aligned, cards will not feed out of the scanner quickly enough and not reach flappers before they close. These cards will end up in bin 1.
- Alternatively, the rollers can be reached from the opposite side, but you'll need to remove the scanner and use a tool.

- The flapper arms and bins should not require any regular cleaning.
Feed Fixer Foot
It is possible that the foot of the Feed Fixer, being rubber, can accumulate small particles. This can lead to small scratches on the backs of cards or difficulty feeding cards.
- To clean the foot, unscrew the front bolt and remove the foot from the feeder mechanism

- Wipe the bottom of the foot down with a cloth, then reinstall it.
